
Okay, so, I had this crazy idea the other day, right? I’ve been trying to get more into digital art, and I was messing around with this “Pencil in Dream” concept. Let me tell you, it was a journey!
Getting Started (and Failing a Bit)
First, I grabbed my iPad and my trusty Apple Pencil. I figured, “Hey, this should be easy!” I opened up Procreate, my go-to drawing app, and just… stared at the blank canvas. Total brain freeze. I had this vague idea of, like, a dreamy, ethereal pencil drawing, but actually doing it? Nope. My first few attempts were, shall we say, less than impressive. They looked more like a toddler’s scribbles than anything remotely “dreamy.”
I decided I needed a plan. So, I closed Procreate for a bit and did some quick sketches in my physical sketchbook. Just some basic shapes, trying to figure out what I even wanted this thing to look like. I doodled some swirly lines, some hazy shapes, and tried to imagine what a “pencil in a dream” would even be.
Finding My Flow (Finally!)
After about an hour of sketching and a strong cup of coffee, I felt a bit more inspired. I reopened Procreate and started with a simple, light gray background. I figured that would give it a softer, dreamier vibe than a stark white canvas.
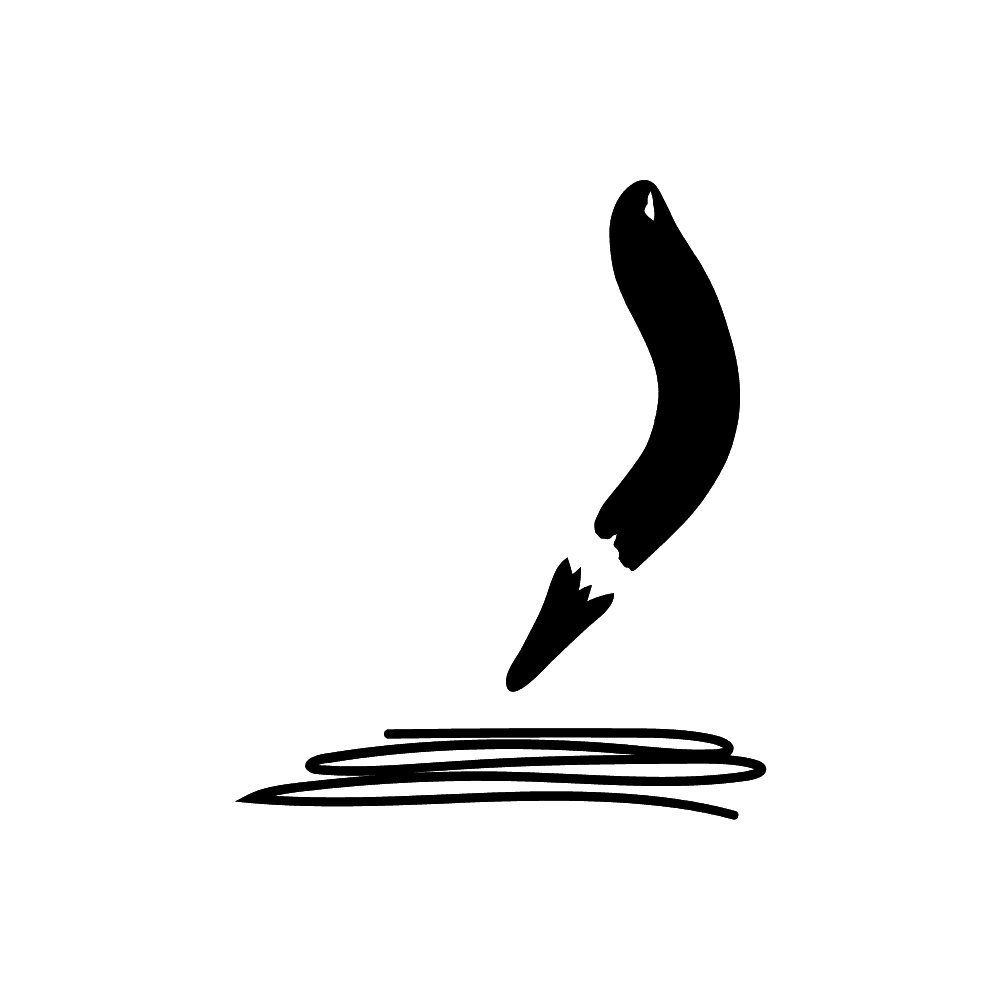
Then, I picked a pencil brush – one that actually looked like a real pencil! – and started drawing the outline of, well, a pencil. But not a regular pencil. This one was all wavy and kind of… melting. I added some extra lines to make it look like it was dissolving into the background.
The Details (and the Frustration)
This is where things got tricky. I wanted to make it look like the pencil was creating the dreamscape around it. So I started drawing these light, wispy lines coming out from the tip of the pencil, like smoke or fog. I used a very light pressure on my Apple Pencil to get that soft, faded effect.
- Layering: I learned pretty quickly that layering was key. I created multiple layers for the pencil, the “smoke,” and the background details. This made it way easier to erase and adjust things without messing up the whole drawing.
- Blending: I spent a lot of time with the blending tool. I wanted to make sure everything looked seamless and soft, like a real dream. This involved a lot of trial and error, smudging and un-smudging until it looked just right.
- Experimenting: The best part was that I started experienting. Adding some light effects and shades.
The End Result
Honestly, it took me a good few hours, but I finally ended up with something I was pretty happy with! It’s not perfect, but it definitely captures that “pencil in a dream” feeling I was going for. It’s this soft, hazy drawing of a melting pencil, with all these wispy lines swirling around it. It’s kind of abstract, but I think it looks pretty cool.
The biggest lesson I learned? Digital art, like any art, takes patience and practice. And sometimes, the best ideas come from just messing around and seeing what happens. Don’t be afraid to experiment and, most importantly, don’t give up if your first few attempts look like a hot mess!


